Print Parameter Properties
The Print Parameter Properties dialog allows you to configure various properties for each print parameter. It is divided into several screens:
- Copies : Add or remove copies and configure how each copy will be processed when printed.
- Data Files: configure any additional input files to be expected when processing a job through the eviQueue application.
- Source File: Controls how the input file should be processed and how the output will be sorted.
- Additional Input Files: Add additional .csv files for Test Print Template and CaptureForm queries.
- Notes: Text field that you can use for whatever notes you need in reference to this print parameter.
- Images: Import and manage any images to be used inside HTML objects.
- Special Processing: Controls special processing for the first and last page, describes page size and orientation for unmodified pages, and fonts to use for any pages not modified by FormFusion.
Copies
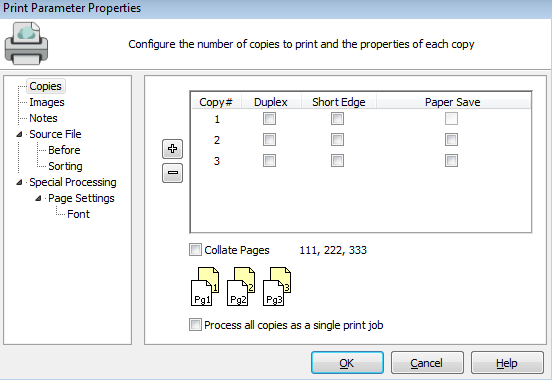
The Copies tab controls the number of copies in the template and how each copy should print on the page. To add a new copy click the Add Copy button (+). This adds a copy with default properties to the bottom of the list. To remove a copy, click the Remove Copy button (-). This removes the last copy from the list.
Note: After removing a copy, it may be necessary to edit the forms beneath the print pParameter and re-assign the copy numbers to print on for each form. See Form Properties: Overlay for more details.
- Plus button: add a copy.
- Minus button: delete the last copy from the list.
- Duplex: check to allow printing on both sides of the page.
- Short Edge: refers to the edge of the paper that will be flipped on when printing in duplex. When checked, the short edge of the page will be used regardless if you are printing in portrait or landscape.
- Paper Save: To save paper, FormFusion can suppress printing of FormStamps which would normally print on the back side of the page, and print the next page of the input file on the back side instead. Duplex must be enabled to use Paper Save.
- Collate Pages: when checked, pages print collated (123, 123, 123) such that each copy is printed together. When not checked, pages print uncollated (111, 222, 333). This groups page 1 of all copies, followed by page 2 of all copies, etc.
- Process all copies as a single print job: Specify that all printed copies should be sent to the printer in a single job. Avoids potential issues where other non-FormFusion jobs are interspersed between copies, or where copies are out of order due to taking different amounts of time to process. This option may be particularly beneficial when collating pages. Note that if this option is checked, the overall time to print will be longer, since the printer will wait until all copies have finished processing before starting to print. If you have copies that use different printers or duplexing settings, these jobs will not be combined. It is recommended that the Color option and Source Tray selection in the FormDirector be the same for all combined copies, since FormFusion must choose a single value for these options for the combined print job.
Data Files
The Data Files tab is used to inform the eviQueue application of how many additional input files to expect, and of what format the files will be, when processing a FormFusion job. The job will not be sent to FormFusion until all of the expected input files are received.
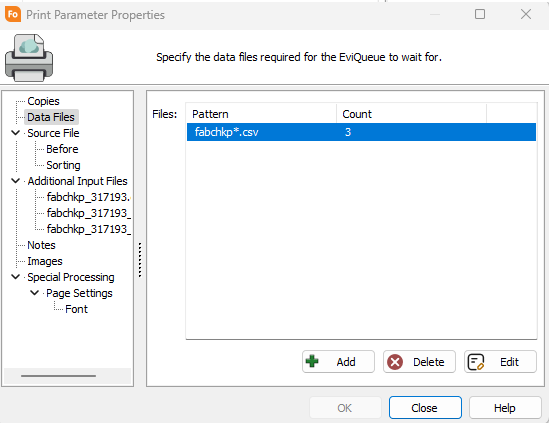
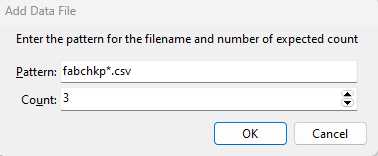
- Pattern - the format of the input file that is to be expected. The inclusion of an asterisk will act as a wildcard.
- Count - the number of additional input files to be expected.
- Note: this field does not include the .lis file - only additional .csv files.
- Add/Edit/Delete - adds, edits, or deletes a Data File Pattern.
Source File
The Source File screen is where you control how the input file should be processed.
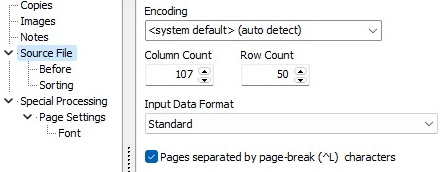
- Encoding - Select the character encoding system that FormFusion will use when processing the input file. You can let FormFusion decide which to use by leaving the default selection auto-detect.
- Column Count - When you fetch a sample file in MapForm, the Column Count will default to the longest line in the file. However, if you know the sample does not contain the longest possible line, you can manually enter the number of columns possible for the sample file.
- Row Count - If the report file does not contain page break characters, you can manually set the number of lines per page by entering it in the Row Count box. This will be helpful when you are trying to map fields for a multiple page sample file.
- Input Data Format - Standard format is used for normal processing of report files, whereas comma-delimited format is used for input files that have been generated with fields separated by commas.
- File Extension - Select the format of the file.
- Pages separated by page break character (^L - control L) - If the original print file contains page break characters to designate the end of every page, check the indicator box.
- Number of page breaks to ignore per MapForm page - This designates the number of page breaks to be ignored so that certain documents may be treated as one page rather than multiple.
Row Count and Page Break work together to interpret the input file correctly. Without page break set, FormFusion will read Row Count number of lines for each page. If FormFusion encounters a page break, that page will end regardless of the number of rows read. If page break is set, FormFusion will read up to Row Count number of lines per page. If a page break hasn't been found by the time Row Count lines have been read, the remaining lines will be skipped until a page-break character has been found.
Source File - Before

Retain a backup of the original print file - Check this box to force FormFusion to make a copy of the original input file for backup purposes.
The copy will be in the same directory as the original input file with the same name and a default file extension of _bak. A different file extension may be designated.
Source File - Sorting
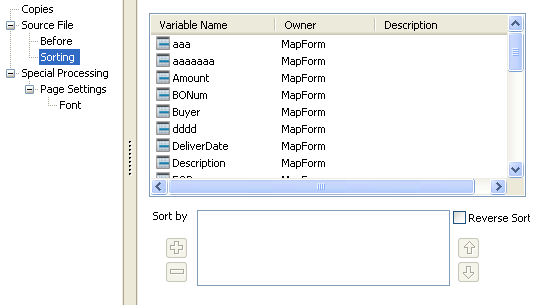
This selection is provided to allow the user to sort the report output. This is provided to eliminate the need to modify your enterprise application to produce output sorted in the desired order.
Sorting is achieved by comparing the value of variables on each page. On the server, sorting is performed by executing its own pass, without producing output or modifying the input. All MapForm variables and many of the system variables are valid for use. Some system variables are not valid (such as FILENAME_) since the value will be empty during the comparison. CaptureForm variables are valid for use depending on when the variable is populated. Only "Page Queries" are executed during sort.
At the top are all of the variables that exist beneath this Print Parameter. Variables cannot be edited from this location but do show the components that "own" the variable name. At the bottom are the currently applied sorting variables. If no variables are present in this list then sorting will not occur.
- To add a variable to the sort list, select the variable and click the green plus button.
- To remove a variable, select the variable and click the red minus button.
- The default sort order is ascending. To reverse the sort order in effect changing each and every field to a descending sort order, check the Reverse Sort checkbox.
- To change the order of the variables in the sort list, use the up and down arrows to move them.
Additional Input Files
The Additional Input Files section is used to upload sample .csv files to the template. It allows you to define the table and column names that are used when mapping data from the .csv input files to the new FormFusion Process connection, which is a temporary in-memory SQL database that allows CaptureForm queries to grab data that exists in the .csv input files.
The sample .csv files added here are used when testing CaptureForm queries that query data from the .csv input files by using the FormFusion Process connection.
Note: Only the first 100 records within each sample .csv file are saved in order to reduce the disk space usage. Because of this, the sample .csv files are not used when performing a Test Print Template. The .csv input files need to be loaded into the Test Print Template window.
It is important to add a sample .csv file for each .csv file coming from the Banner process. If this is not done, the .csv files will not be processed by FormFusion.
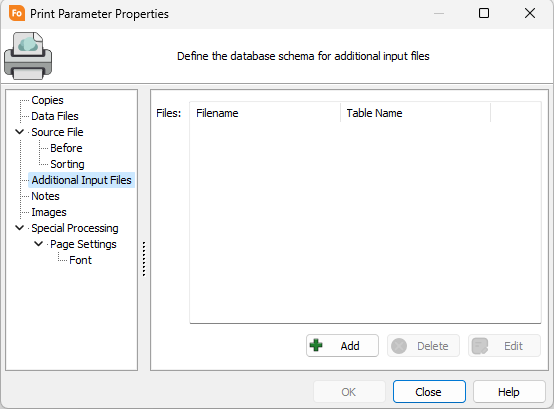
- Add/Edit/Delete - adds, edits, or deletes an input file.
Select Add to configure your input file data.
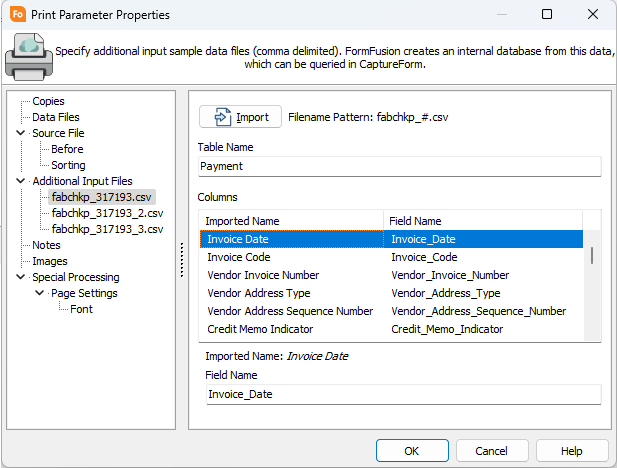
- Import - import your sample .csv file.
- File Name Pattern -the pattern generated from the file name, which is used to match incoming files to the appropriate file definition.
- Table Name - the name of your table.
- Columns - shows the original column names from the file with the associated Field Name that is used for the in-memory database.
- Imported Name - the original column name from the imported file.
- Field Name - the name generated from the imported file after spaces and special characters have been converted to underscores. This name can be edited for use as the column name of the in-memory database.
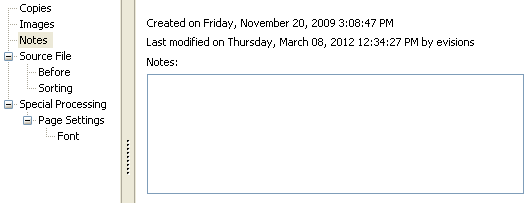
Notes
The Notes field lets you enter any desired text into the Notes field to help you document the purpose of this Print Parameter.
Images
The Images screen is where you can add images that will be used within an HTML object on the FormStamp.

- Add/Remove/Up/Down - Click the green plus sign to browse for an image. The red X deletes an image, and the arrow buttons move images up and down in the list.
- Load - Ran existing image with a new one.
- Export - Save the image to a file system.
- Zoom to Fit- Shrinks or expands the image to fit the size of the HTML object.
- Display Name - The name of the image. Images in HTML objects can be referenced by name or by index (position in the list).
Special Processing

- Ignore pages that are blank- This option controls whether blank pages in the input file should be ignored.
- Special First Pages Instruction - This option controls how FormFusion will process the first page(s) of the input report file. If set to normal processing then the first page(s) will be treated just like any other page of data. If set to Print first ## pages without modification then FormFusion will not stamp any forms on the output page, for the specified number of pages, and will use the default font to render the text. If set to Do not print first ## pages then FormFusion will not perform any processing for the first specified number of pages.
- Special Last Pages Instruction - This option controls how FormFusion will process the last page(s) of the input file. Options are the same as above in Special First Pages Instruction however are in respect to the end of the file.
Special Processing - Page Settings
This dialog allows you to specify page size and page orientation for pages that are not modified by FormFusion.

Special Processing - Font
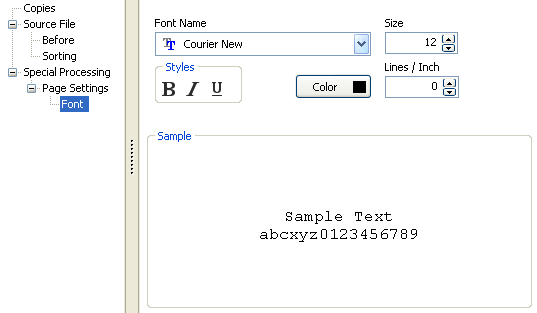
This dialog allows you to specify the font to be used for pages that are not modified by FormFusion.
